Why local music?
There was a time when you could own the music you listened to. Well, that’s still true today, but it’s much less common. Due to the pervasiveness of music streaming services like Spotify, many of us are dependent on subscriptions to proprietary services to be able to listen to our favorite songs.
At the time of writing this, I am 24 years old. That makes me fairly young — and I’m just barely old enough to remember music before streaming as we know it today. If I wanted to listen to something, I had to beg my parents for a CD. And the nice thing about CDs is, well, you own them. Nothing can stop you from listening to, copying, doing whatever you want with the music you bought, as long as the CD itself doesn’t break.
CDs really came in clutch for me when I got my first car, a hand–me–down Toyota Camry almost the same age as me. Being an ancient vehicle, it didn’t have an aux input, let alone Bluetooth. I couldn’t listen to anything on my Spotify library! What it did have was a CD player. And boy, I bought a lot of CDs. I listened to them so much that I memorized the track numbers of my favorite songs.
I’m sure that what I’m describing isn’t a unique experience, especially if you’re even a bit older than I am. But “these days”, and especially for the younger generation, it’s completely foreign.
Recently, I decided that I want to be in control of my own music library. I want to have music. I want to listen to it offline — and I want this ability to last forever, not just until my Spotify subscription expires.
This article isn’t about how to get music files. There are many ways — ripped CDs, Bandcamp purchases, label downloads, digitizing vinyl, you name it. What matters is actually having files. In my view, owning files gives you freedom. Control over formats, metadata, play back clients, and backups. Most importantly, you may rely on your hardware and software, but you’re not dependent on a service.
Instead, I’ll be talking about what you can do once you have the files. Namely, I will be describing my own process for organizing my library, and how I prefer listening to it on my Linux computer.
Thus, the post is split into two parts: library intake and playback.
Digital library maintenance
Once I’ve obtained some files — say, an album — there’s a few things I like doing before actually adding it to my library. I think of this like an intake process for new music.
Note
The tools and process I describe aren’t only for intake; they can be applied to your entire library. I did this once to normalize everything, and now I only need to apply it to new files before adding them to my library.
Normalizing metadata
The first step is to normalize the metadata. For example, imagine you’ve got multiple albums from an artist called “FooBar”. What if their metadata has subtle differences? One album is set to “FOOBAR”, another “Foobar”, “FooBar”, etc. You may end up with three “different” artists in your music player client; even though these are all really the same artist.
Luckily, there’s a solution, and it’s called MusicBrainz. It’s an open encyclopedia of music metadata. From its homepage:
Quote
MusicBrainz aims to be:
-
The ultimate source of music information by allowing anyone to contribute and releasing the data under open licenses.
-
The universal lingua franca for music by providing a reliable and unambiguous form of music identification, enabling both people and machines to have meaningful conversations about music.
If your music isn’t super obscure, chances are that it’s in the database. What’s great about this is that you can apply what are basically “canonical” metadata tags to your files. Each will have as much metadata is as possible, really expanding your horizons in terms of sorting, organizing, creating playlists, integration with other programs, etc.
Looking up your tracks and updating their metadata by hand doesn’t seem fun. Thankfully, MusicBrainz provides an open–source tool to solve the problem: Picard. It’s capable of scanning your library, associating each artist, album, and track with their corresponding database entry, and updating the metadata tags of all the music files.
So, how does it work?
The first step is a simple lookup — based on the metadata that’s already attached to the file, Picard will try and find it in the database, then complete (or correct) any missing information.
If the file doesn’t have any metadata (or the lookup returned incorrect results), then fret not, because Picard also supports computing a fingerprint (think of it like a hash, but for audio) and looking that up.
One of my favorite things about using this method (Picard) is that it can also figure out which release of a given album/song you have, and downloads the appropriate album cover art. Finally, it also tags the files with a “MusicBrainz ID”, which can be used by other tools to fetch metadata and album art (see integrations).
Synchronized lyrics
Depending on your playback client, you may want synchronized lyrics. This is a standard file format that a number of program know how to handle, and show the lyrics of the song you’re listening to, Karaoke style.
The biggest and best database for LRC files is LRCLIB. Like MusicBrainz, they also provide an automation tool, although not nearly as reliable as Picard.
LRCGET can be used to mass–download LRC files for your entire library. However, it’s not the smartest — it’s occasionally been unable to identify certain songs, or downloaded plain lyrics when synchronized ones were available.
Another catch: the downloaded files aren’t tagged with any metadata. They’re
saved to the same directory as the audio file, and retain the same name with a
different extension. For example, my-song.lrc belongs to my-song.flac.
However, some clients may not correctly associate these two files, so tagging
the lyrics properly would be helpful.
I couldn’t find a tool to do this for me, so I wrote my own. LRC Tagger is a small Python utility that crawls your music library, discovers LRC files and their associated music, then grabs the needed metadata from the audio files and attaches them to the lyric files in the proper format.
Playback
Once your library is tagged properly, it’s time to actually listen to it! How you listen comes down to strong personal preference, so I’ll just share my setup, which you can use for inspiration.
Music player daemon
In true Unix philosophy fashion, the process of listening to your music is split
across different programs. The first is mpd, which
is a music player daemon. It runs in the background, indexes your library, and
then waits for commands from clients.
Clients can construct a queue of music to play, and then mpd connects to your
audio output service and plays it. I think it’s quite elegant; it handles
reading your files and their metadata to build a database that can be searched
through, deals with actually playing the music, and that’s it.
Everything else is left up to the clients, which provide an interface to
interact with mpd.
Clients
mpc
mpc is the simplest of the bunch, because it’s only a command line interface.
I like having it installed because it’s convenient to control mpd from any
terminal. For instance, I may be in the middle of an unrelated terminal session,
and but I want to skip to the next song in the queue. Since I’m already in the
terminal, I just need to type mpc next, and it’s done!
mpc is also great for scripting, automation, and headless interaction. For
example, I have some keybindings in Niri set up to control mpd via simple
commands like mpc toggle, mpc stop, etc.
rmpc
So, mpc is convenient at times, but it’s not exactly ideal for using as your
only client. That’s where rmpc comes in.
It’s a terminal user interface to mpd that I can only describe as…
beautiful. It supports album cover art, synchronized lyrics, playlists, advanced
sorting & filtering, visualization with cava, all inside your favorite terminal.
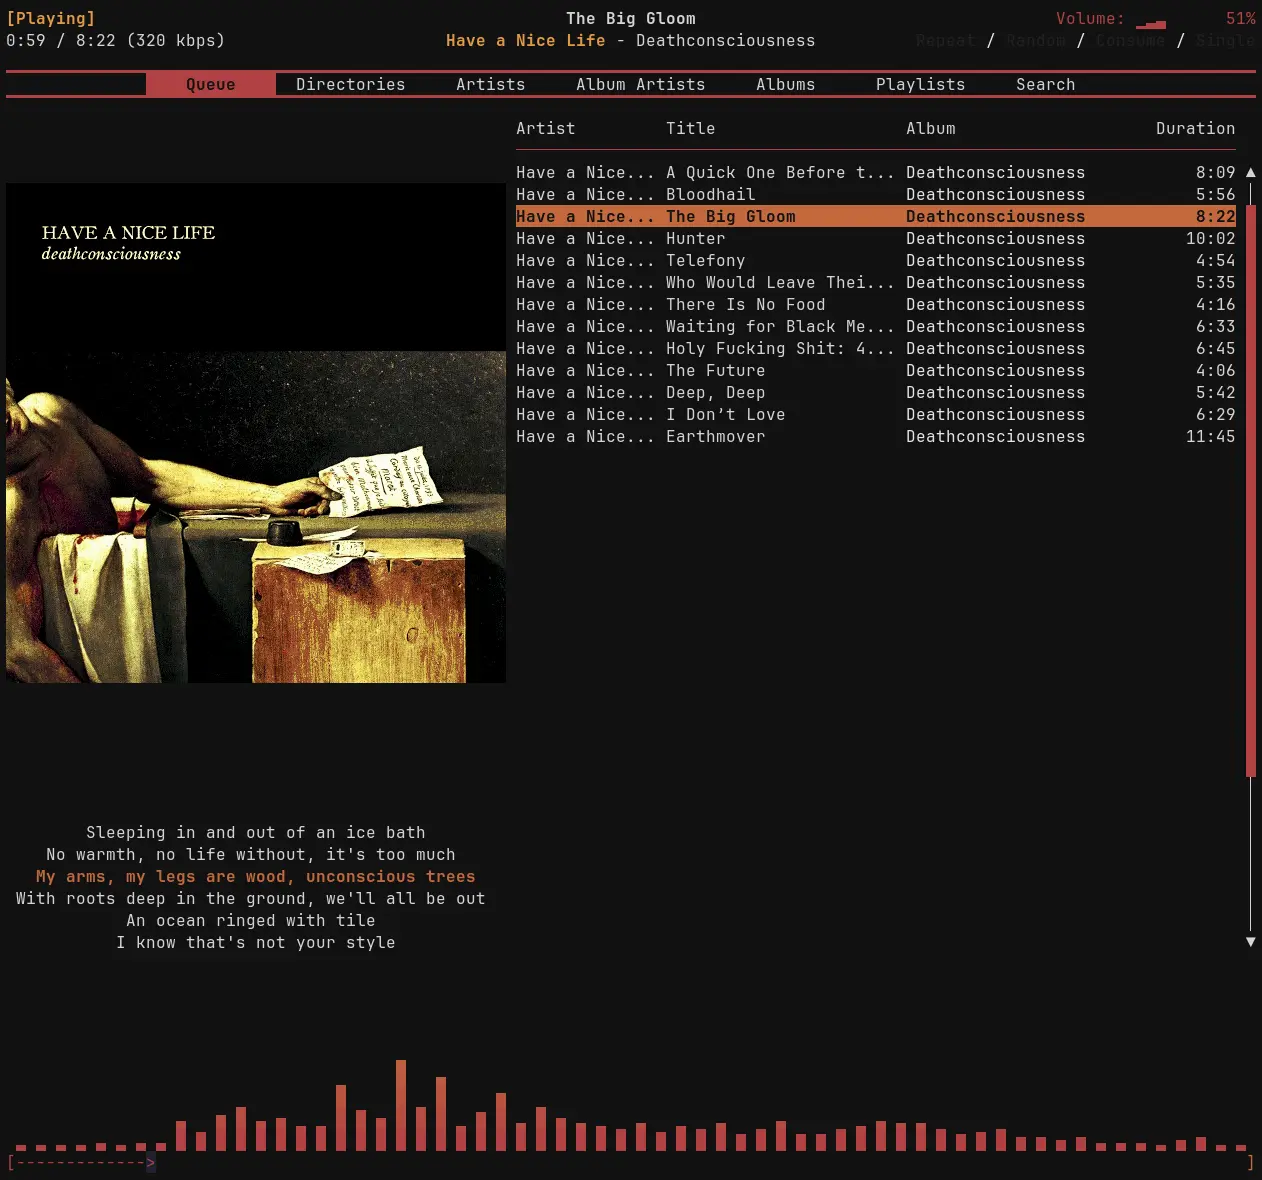 My rmpc client with Ashen theme, synchronized lyrics (left), sixel album cover, and cava visualization (bottom).
how to recreate my rmpc configuration.
To recreate my setup, you can start by installing and configuring the Ashen theme.
Next, the following goes into the tabs array of your config.ron:
(
  name: "Queue",
  pane: Split(
    direction: Vertical,
    panes: [
      (
        size: "80%",
        pane: Split(
          direction: Horizontal,
          panes: [
            (size: "40%", pane: Split(
              direction: Vertical,
              panes: [
                (size: "80%", pane: Pane(AlbumArt)),
                (size: "20%", pane: Pane(Lyrics)),
              ],
            )),
            (size: "60%", pane: Pane(Queue)),
          ],
        ),
      ),
      (size: "20%", pane: Pane(Cava)),
    ],
  ),
),
Setting up cava (the visualizer) is a tad more complicated. First,
cava needs to be installed on your system.
Then, you need to add a fifo output to mpd.conf:
audio_output {
  type "fifo"
  name "my_fifo"
  path "/tmp/mpd.fifo"
  format "44100:16:2"
}
Finally, you must add a cava section to your rmpc config.ron:
cava: (
  framerate: 60,
  autosens: true,
  sensitivity: 100,
  lower_cutoff_freq: 50,
  higher_cutoff_freq: 10000,
  input: (
    method: Fifo,
    source: "/tmp/mpd.fifo",
    sample_rate: 44100,
    channels: 2,
    sample_bits: 16,
  ),
  smoothing: (
    noise_reduction: 77,
    monstercat: false,
    waves: false,
  ),
  eq: []
),
Lyrics are much more straightforward. You just need to set lyrics_dir to the
same path as your music_directory in mpd.conf:
lyrics_dir: "/path/to/Music"
Note
If lyrics aren’t being picked up by rmpc, check out the
lyric metadata section of this post.
Aside
What you’re seeing is rmpc with the Ashen
color scheme. While I am the creator and maintainer of Ashen, rmpc support was
actually contributed by a user, which is how I discovered the program in the
first place!
Integrations
The final component of my setup is a few simple integrations of mpd with other
software.
Discord
One of my favorite things about Spotify is its Discord integration. I like it when my friends can see what I’m listening to — it sometimes leads to messages and interesting discussions.
It turns out, an mpd–Discord integration already exists. I’m very happy
about that because, knowing myself, I otherwise would’ve spent a week rolling it
myself.
It’s called mpd-discord-rpc,
and like mpd, it’s just a daemon that needs to run in the background. The Arch
packages already come with a systemd service, so for me, it worked
out–of–the–box with literally zero configuration needed.
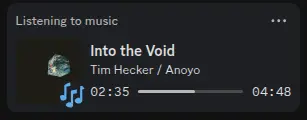 How mpd-discord-rpc looks on my Discord profile.
Note
The Discord integration in particular is an example of why normalized metadata is important. The daemon uses MusicBrainz to find and display the correct album cover art for the song you’re listening to; so if you want the complete experience, your metadata needs to be correct.
MPRIS
Another nice integration is
mpd-mpris. This daemon broadcasts
your mpd listening status with the
MPRIS protocol,
which is an API for controlling media players. This really opens the
floodgates in terms of “things that can interact with mpd”.
For example, I can now control playback from my smartphone using KDE Connect. Nicotine+ (a Soulseek client), a number of IRC chat clients, and many, many other programs also use MPRIS for their various “Now Playing” features.
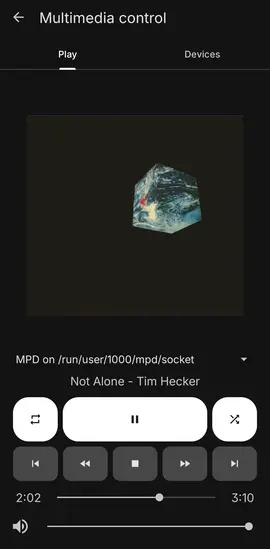 How the KDE Connect remote control looks on my Android phone.
Note
MPRIS integration means you can also control mpd playback with playerctl,
although I recommend using mpc for command–line controls whenever possible.
Conclusion
Owning your music files means owning the experience. By taking the time to normalize metadata, fetch synchronized lyrics, and set up a local playback system, I’ve built a music library that feels reliable, personal, and permanent — all without having to sacrifice comforts like Discord integration and mobile remote control.
Streaming may be more convenient, but with a local setup like mine, I know my music is organized, accessible offline, and fully under my control — both today, and year from now.